CS2 Centered Viewmodel Guide
2025-06-04
Introduction
A while ago, the centered viewmodel became popular and was a hot topic among players. Though I’m a bit late to the trend, I finally decided to try it myself—and found that it really improved my aim and gameplay. I wanted to share my experience and the benefits of this setup with everyone, so in this guide we’ll reference and quote relevant YouTube videos to illustrate how to configure a centered viewmodel in CS2.
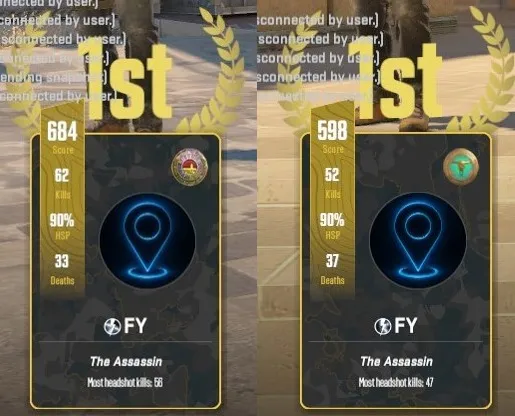
Well, it’s only Deathmatch, but I’ve been hitting headshot rates over 90% more often. This is the first time I’ve ever experienced anything like this…!
Why Use a Centered Viewmodel?
Traditional viewmodels in CS2 place your weapon slightly to the right or left of center. However, a centered viewmodel brings the weapon directly under your crosshair. Pros such as NiKo and others have adopted a centered viewmodel for several reasons:
-
Improved Crosshair Focus:
With the weapon’s barrel directly under the crosshair, you can visually align shots more quickly without mental adjustment. -
Reduced Distraction:
A centered weapon model minimizes off-center weapon animation, letting you concentrate on opponents and map movements. -
Consistent Tracking:
The weapon’s position will stay fixed relative to your crosshair, making it easier to track targets at any distance. -
Pro Practice Example:
Watch the embed below to see how NiKo maintains crosshair discipline with a centered viewmodel during clutch situations.
Step 1: Determine Your Preferred Viewmodel Commands
CS2 uses console commands to adjust viewmodel offsets. The key commands are:
-
viewmodel_fov: Field of view for your weapon model (smaller values bring it closer). -
viewmodel_offset_x: Horizontal offset (positive moves weapon right; negative moves left). -
viewmodel_offset_y: Forward/backward offset (positive moves weapon closer; negative moves it farther). -
viewmodel_offset_z: Vertical offset (positive raises the weapon; negative lowers it).
To center your viewmodel, set viewmodel_offset_x to 0 (or a small value)
and adjust viewmodel_offset_y so the weapon doesn’t clip into walls. Below are
three commonly used settings by professional players. Click “Copy” next to each block to copy
the entire command set.
NiKo Viewmodel Settings
viewmodel_fov 65; viewmodel_offset_x -0.5; viewmodel_offset_y 1; viewmodel_offset_z -2; viewmodel_presetpos 1;
karrigan Viewmodel Settings
viewmodel_fov 60; viewmodel_offset_x -1.5; viewmodel_offset_y 1; viewmodel_offset_z -1; viewmodel_presetpos 1;
iM Viewmodel Settings
viewmodel_fov 60; viewmodel_offset_x 0; viewmodel_offset_y 1; viewmodel_offset_z -2; viewmodel_presetpos 0;
ZywOo Viewmodel Settings
viewmodel_fov 68; viewmodel_offset_x 2.5; viewmodel_offset_y 0; viewmodel_offset_z -1.5; viewmodel_presetpos 2;
For more professional viewmodel setups, you can find additional settings at ProSettings CS2 .
Step 2: Create or Edit Your Autoexec or Viewmodel Config
To make these changes permanent, add them to your autoexec.cfg or a dedicated
viewmodel.cfg file. For example:
File Location
Your CS2 config files are typically stored here:
C:\Program Files (x86)\Steam\steamapps\common\Counter-Strike Global Offensive\game\csgo\cfgCreate or open autoexec.cfg and append the following lines:
// ===== Autoexec: Centered Viewmodel Settings =====
viewmodel_fov 65
viewmodel_offset_x -0.5
viewmodel_offset_y 1
viewmodel_offset_z -2
viewmodel_presetpos 1
bind "F8" "viewmodel_fov 68; viewmodel_offset_x 2.5; viewmodel_offset_y 0; viewmodel_offset_z -1.5; viewmodel_presetpos 2"
// Optionally bind a key to toggle between centered and default
bind "F9" "toggle viewmodel_offset_x 0 2; toggle viewmodel_offset_z -1 1"
Explanation:
- Lines 1–4 set up your centered viewmodel immediately upon launch.
-
The
F8bind reapplies the centered viewmodel if you experiment or change it in-game. -
The
F9bind togglesviewmodel_offset_x 0→2andviewmodel_offset_z -1→1, allowing quick switching to a slightly offset viewmodel if desired.
Step 3: Load Your Config and Verify
Open CS2, ensure your console (~) is enabled, and type:
exec autoexecIf you created a separate viewmodel.cfg, type:
exec viewmodelYour weapon should now appear centered under your crosshair. You can move around in a practice lobby or shooting range to verify that your model stays central during movement and strafing.
Benefits of a Centered Viewmodel
Summarizing the key advantages:
- Precision: Crosshair alignment becomes more intuitive without compensating for off-center weapon sway.
- Consistency: A fixed central weapon model means fewer visual surprises when peeking/holding angles.
- Improved Tracking: Targets stay under your crosshair more steadily as you track movement.
- Reduced Distraction: Peripheral vision is clearer with less weapon swing in view.
Conclusion
Switching to a centered viewmodel in CS2 can give you a subtle but meaningful edge in aiming and target
focus, much like many professionals have demonstrated in tournaments. By following the steps
above—adding the console commands to your autoexec.cfg or a dedicated
viewmodel.cfg—you’ll
be able to replicate that consistency. Experiment with slight variations in
viewmodel_offset_y and
viewmodel_fov to find the exact feel that suits you best. Give it a try in practice servers
and
watch how your precision improves!